
How to Make a Junk Journal Flip Pocket with Hidden Writing Space
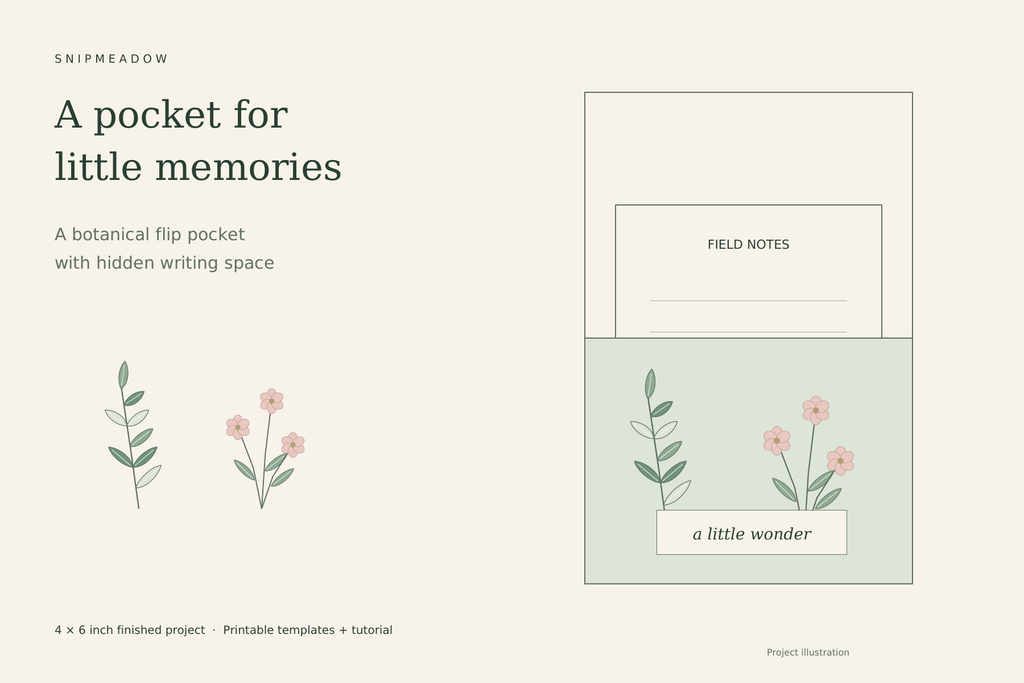
A junk journal flip pocket gives you a place to tuck a small card while keeping room for a longer note underneath. The front holds your tag or paper keepsake. Open it like a little greeting card, and two writing panels appear inside.
For this junk journal flip pocket, you will make a folded paper base, add a pocket to the front, and attach the back to a journal page. The finished piece measures 4 by 6 inches when closed. A leaf print, a small label, and a cream journaling card will give it a botanical look without covering the writing space.
Table of Contents
What you need
- Paper for the folded base, with a plain or lightly patterned side for writing
- A paper scrap for the front pocket and a small piece for the insert card
- A ruler, pencil, and scissors or a paper trimmer
- Paper craft glue with a fine tip, plus a pen
- Optional flat decorations such as botanical cutouts or a paper label
For your junk journal flip pocket, choose paper that folds easily and holds its shape. Make a plain-paper version first if you are deciding how much room to leave on your journal page.
Download your free junk journal flip pocket templates
The matching SnipMeadow printable comes in A4 and US Letter versions. Each three-page PDF includes an 8-by-6-inch folding base, a decorated 4-by-3-inch botanical pocket, a 3 1/4-by-4 1/2-inch Field Notes card, and an assembly guide. Choose the version that matches the paper in your printer; both make the same 4-by-6-inch junk journal flip pocket.
Print single-sided, in landscape, at 100% or Actual Size. Turn off Fit or Shrink. Start with sheet two and measure both sides of its one-inch check square: each should be exactly 1 inch (25.4 mm). If the square is the wrong size, correct the print settings before printing the remaining sheets or cutting.
For help with scaling, see Adobe’s PDF page sizing guide. Use the PDF pages as your cutting templates; the project images and assembly diagrams in this article are illustrations, not full-size patterns.
The printed cream face of the base goes on the outside, and the unprinted reverse becomes your hidden writing space. Cut solid outside lines and score the dashed center line without cutting through it. Keep the glue on the reverse of the pocket piece, along its left, right, and bottom edges.
Personal use only. Please do not redistribute or sell the files or designs. Share this article’s link so others can find the project.
Cut these three pieces
| Piece | Size in inches | Purpose |
|---|---|---|
| Folded base | 8 wide by 6 tall | Folds to 4 by 6 inches |
| Front pocket | 4 wide by 3 tall | Holds a small card or paper keepsake |
| Insert card | 3 1/4 wide by 4 1/2 tall | Leaves room beside the glued pocket edges |
Before attaching anything, check that the closed 4-by-6-inch base fits your page and can open without catching on the binding or nearby decorations.
How to assemble the flip pocket

1. Fold the base
Place the 8-by-6-inch paper horizontally, with the side you want to write on facing up. Bring the left edge over to meet the right edge. Crease the fold to make a 4-by-6-inch card. Turn it so the fold sits on the left and the front cover opens to the left, like a book.
Open it once to check which surfaces will be inside. Close it again and lightly mark the outside back with a pencil. That is the surface you will eventually attach to your journal.
2. Add the front pocket
Place the 4-by-3-inch pocket piece across the lower half of the closed front cover. Check that any pattern faces the right way up. Lift the pocket piece and apply a narrow line of glue to its back along the left edge, right edge, and bottom edge. Leave the entire top edge unglued.
Aim for glue lines about 1/8 inch wide. Align the pocket with the sides and bottom of the front cover, then press only the glued edges. Let the adhesive dry according to its instructions before sliding the insert card inside. It should move freely, with part of the card visible above the pocket.
3. Plan the hidden writing space
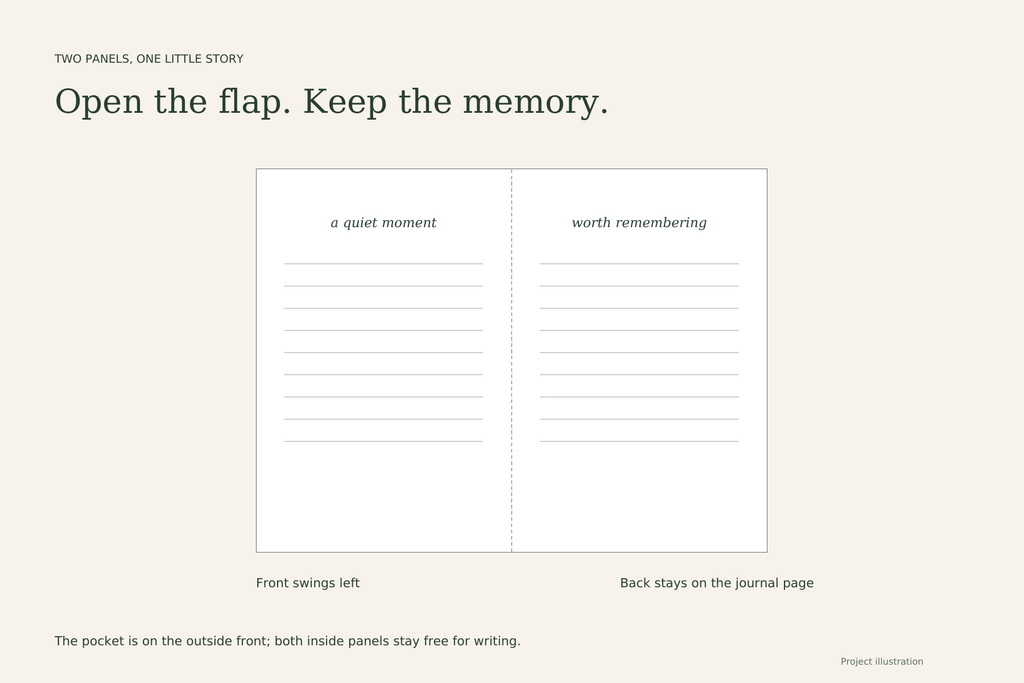
Open the flap and use the two inside panels for a note, a date, or a short memory. If your paper is too dark to write on comfortably, add a smaller rectangle of plain paper to each panel. Leave a narrow gap beside the center fold so the added paper does not cross the hinge.
For a botanical page, write about a walk, a plant you noticed, or a small change in the season. Keep anything you want to reread on the inside, and place a title or date on the removable card.
4. Attach the back to your journal
Place the closed junk journal flip pocket on your page with its fold on the left. Open and close it before gluing to check the movement. Leave space between the fold and the journal binding, and keep the flap clear of other pockets or raised embellishments.
Apply a thin, even layer of adhesive to the outside back cover you marked earlier. Fix that back cover to the journal page while keeping the front cover free. Do not glue the two inside panels together. Let the adhesive dry with the flap open before closing the journal.
5. Decorate without blocking the movement
Add a small botanical cutout or label to the front pocket. Keep decorations away from the pocket opening, and avoid gluing anything across the fold. A narrow paper border on the removable card can echo the colors on the front.
For coordinating details, explore our free printable botanical tags and journal cards. Check the printed size against your pocket before choosing an insert, or use the blank card from the cutting list.
If the pocket does not work as expected
If the card catches, let the glue dry fully and check that no adhesive has squeezed into the opening. Trim a little from each side of the insert if needed. Keep the pocket for flat paper pieces; several thick cards can pull at its glued edges.
If the flap will not close, remove decorations near the hinge and check that any writing-paper layers stop short of the fold. If the whole journal becomes difficult to close, reduce the number of inserts or move the project to a page with more room.
Junk journal flip pocket questions
Can I make the pocket smaller? Yes. First measure the available space on your journal page, including room for the flap to open. For a smaller handmade version, choose a closed width and height, then cut the unfolded base twice that width. Make the front pocket the same width as the closed cover and about half its height. Test the insert with scrap paper and leave clearance beside the glue lines. If you resize the printable, every piece must use the same scale; the stated dimensions and one-inch check will change.
What paper should I use? Choose paper that your printer accepts and that can fold cleanly without cracking. Heavy card may make the hinge stiff or add too much bulk to a small journal. Test one base on plain paper before using a favorite sheet. Score the fold gently with a blunt tool and a ruler, then crease it without cutting through the hinge. Keep decorations flat, and let the glue dry before checking whether the journal closes comfortably.
Should I print on both sides? Print the supplied templates on one side only. The cream printed face becomes the outside of the folded base, while the plain reverse leaves two clear writing panels inside. The lined panels in the project illustration suggest how you could arrange your notes; those lines are not printed on the reverse of the PDF base. Add your own handwriting, a date, or small plain-paper panels after folding, keeping the center hinge clear.
Ways to make it your own
Use brown paper and a fern label for a woodland page, or choose a soft floral scrap and a plain cream card. For a winter version, pair a small evergreen motif with a note about a December memory. The pocket construction stays the same; the paper and writing give it a different purpose.
If you would like a simpler pocket to pair with it, see our journal tag pocket tutorial. Place your finished junk journal flip pocket on a page where you will enjoy opening it again, and tuck in one note worth keeping.
Looking for another little project? Explore Journaling, Printables or Paper Crafts.