
How to Press Flowers: 7 Easy Steps for Beginners
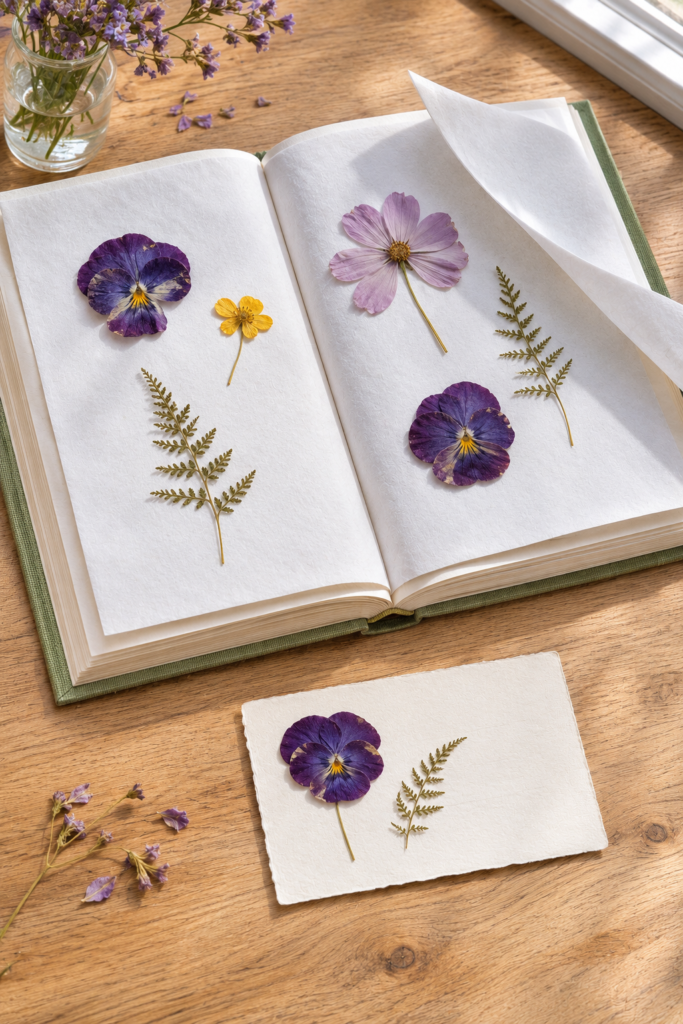
Learning how to press flowers gives you a small collection of botanical details for cards, journal pages and paper keepsakes. A single bloom can become the starting point for a page: its shape suggests a border, its color suggests a paper scrap, and the date you collected it gives you something to write about.
Start with the book method below. Then try a simple cardboard press if you want to prepare several small specimens together. You can plan a journal layout while the flowers dry.
How to press flowers at home: place fresh, surface-dry blooms between smooth absorbent paper inside a heavy book, close it carefully, and add even weight. Keep the stack in a warm, dry place until the flowers are fully dry. Plan for a few weeks; a flat-looking flower may still contain moisture.
Table of Contents
Supplies and suitable flowers
- Fresh flowers or thin leaves, without surface moisture
- Smooth, absorbent, uncoated paper, such as blotting paper or plain printer paper
- A heavy book you do not mind marking
- Additional books for weight
- A pencil for recording the date and plant name
Choose flatter blooms for your first attempt. Violets, simple daisies and thin leaves are useful starting points. A thick, tightly layered flower head is harder to flatten and dry; try a few individual petals instead. The University of Maryland Extension flower-pressing guide explains which materials work and why bulky flowers need more attention.
Avoid waxed paper for this slow drying method: it holds moisture. Textured paper towels can leave marks on petals. Choose smooth paper for the layer touching the flower, and protect both sides of the book because plant pigments can stain.
Which paper should touch the flowers?
For this book method, choose blotting paper or smooth, plain printer paper. If you already have newspaper, it is another absorbent option. The useful distinction is between paper that takes up moisture and a nonstick kitchen liner. Start with absorbent paper rather than treating parchment, waxed paper and blotting paper as interchangeable.
Keep the layers simple: book page, protective paper, flower, protective paper, book page. Smooth out creases before adding weight. If you are learning how to press flowers for a particular journal spread, prepare a few similar blooms separately so you can choose the shape that suits your layout.
How to press flowers in a book
This approach follows the basic book-pressing method described by Royal Botanic Gardens, Kew. Keep your first batch small so you can compare the results.
1. Choose a fresh, surface-dry flower
Use a flower from your own garden, a florist or somewhere you have permission to collect. If picking outdoors, wait until dew or rain has dried. Press it promptly, before it wilts.
2. Set out your protective paper
Open the book near its middle. Lay absorbent paper over the page, with enough room around the flower to cover it fully.
3. Arrange the petals and leaves
Position the bloom as you want it to appear when flat. Separate overlapping pieces gently. Leave space between specimens.
4. Add the upper paper layer
Lower another sheet carefully over the flower, then close the book without shifting the arrangement.
5. Apply even weight
Place additional heavy books on top. Keep the stack stable in a warm, dry spot.
6. Check moisture and drying progress
Lift the paper cautiously when checking. Replace damp absorbent sheets, and return flowers that still feel moist to the press. Avoid repeatedly lifting fragile petals just to inspect the design.
7. Remove and label the dry flower
Support it as you lift it from the paper. Record the plant name if known and the collection date before moving on to your craft project.
How to press flowers with a cardboard press
For a small reusable press, cut two sturdy cardboard squares about 8 inches across and prepare matching sheets of uncoated newsprint. Add a paper layer, arrange your flowers, then cover them with more paper and the second piece of cardboard. Secure the stack with rubber bands in both directions and place heavy books on top.
University of New Hampshire Extension suggests allowing at least two weeks before checking its cardboard press. Return specimens that are not dry for a few more days. Thin flowers and leaves are better suited to this beginner setup than thick flower heads.
For additional layers, use corrugated cardboard between paper-and-flower sections to help air move through the stack. The Desert Botanical Garden plant-press activity shows this alternating arrangement. Keep specimens separated and avoid bending the cardboard when tightening the bands.
How long does it take to press flowers?
Allow a few weeks in your project plan, then judge the flowers themselves. The RHS herbarium activity allows two to four weeks for its press. Other setups may dry sooner. Thickness, moisture and the drying environment all matter.
Do not glue a specimen into a journal while it still feels damp. Dried flowers can be brittle, so handle them gently. The Natural History Museum guide explains both the variable drying time and the importance of even pressure.
Common problems to check
- Shriveled sections: uneven contact can leave parts of a specimen unpressed. Use flatter material and check that the stack applies pressure across it.
- Slow drying: thick, moisture-rich plant parts are more difficult. Start with thin specimens and absorbent paper.
- Brown or faded petals: check for damp paper and avoid leaving the press somewhere humid. Better moisture removal can help preserve color, but exact fresh colors are not guaranteed.
- Marks on petals: check the texture of the paper touching them. Use a smooth layer for the next batch.
A simple pressing record
Use one small card to record the flower, paper type, start date and date it was ready. Add a short observation, such as “violet kept its shape” or “thicker center needed longer.” This turns trial and error into a useful reference for your next batch, rather than leaving you to remember which combination worked.
When choosing how to press flowers for a deadline, work backward from the drying stage. Finish the blank card, envelope or journal background first, and attach the botanical piece only when it is ready. A penciled flower outline can reserve its place while you wait.
How to store pressed flowers before crafting
Store only fully dried flowers. Lay them flat between protective sheets, support the stack with stiff card, and keep it in a dry container away from direct sunlight. Lift delicate specimens carefully with tweezers rather than gripping a petal. Jennifer Rizzo’s book-pressing tutorial includes a useful storage approach for keeping fragile flowers flat until a project is ready.
Organize small batches by the way you intend to use them: one-flower cards, thin leaves for borders, or loose petals for a collage. Put a label beside each batch instead of writing on the protective sheet directly over a flower. For finished journal pages, leave a little breathing room around the specimen so it does not sit directly beneath a bulky pocket or embellishment.
Three botanical paper craft ideas
Once everything is dry, choose one small project. These layout suggestions are designed to give your flower room to stand out.
These pressed flower crafts fit naturally alongside other botanical crafts: paper collage, simple flower drawings and handwritten observations. Start with what you already have, then choose craft ideas that suit the size and shape of the specimens you actually dried.
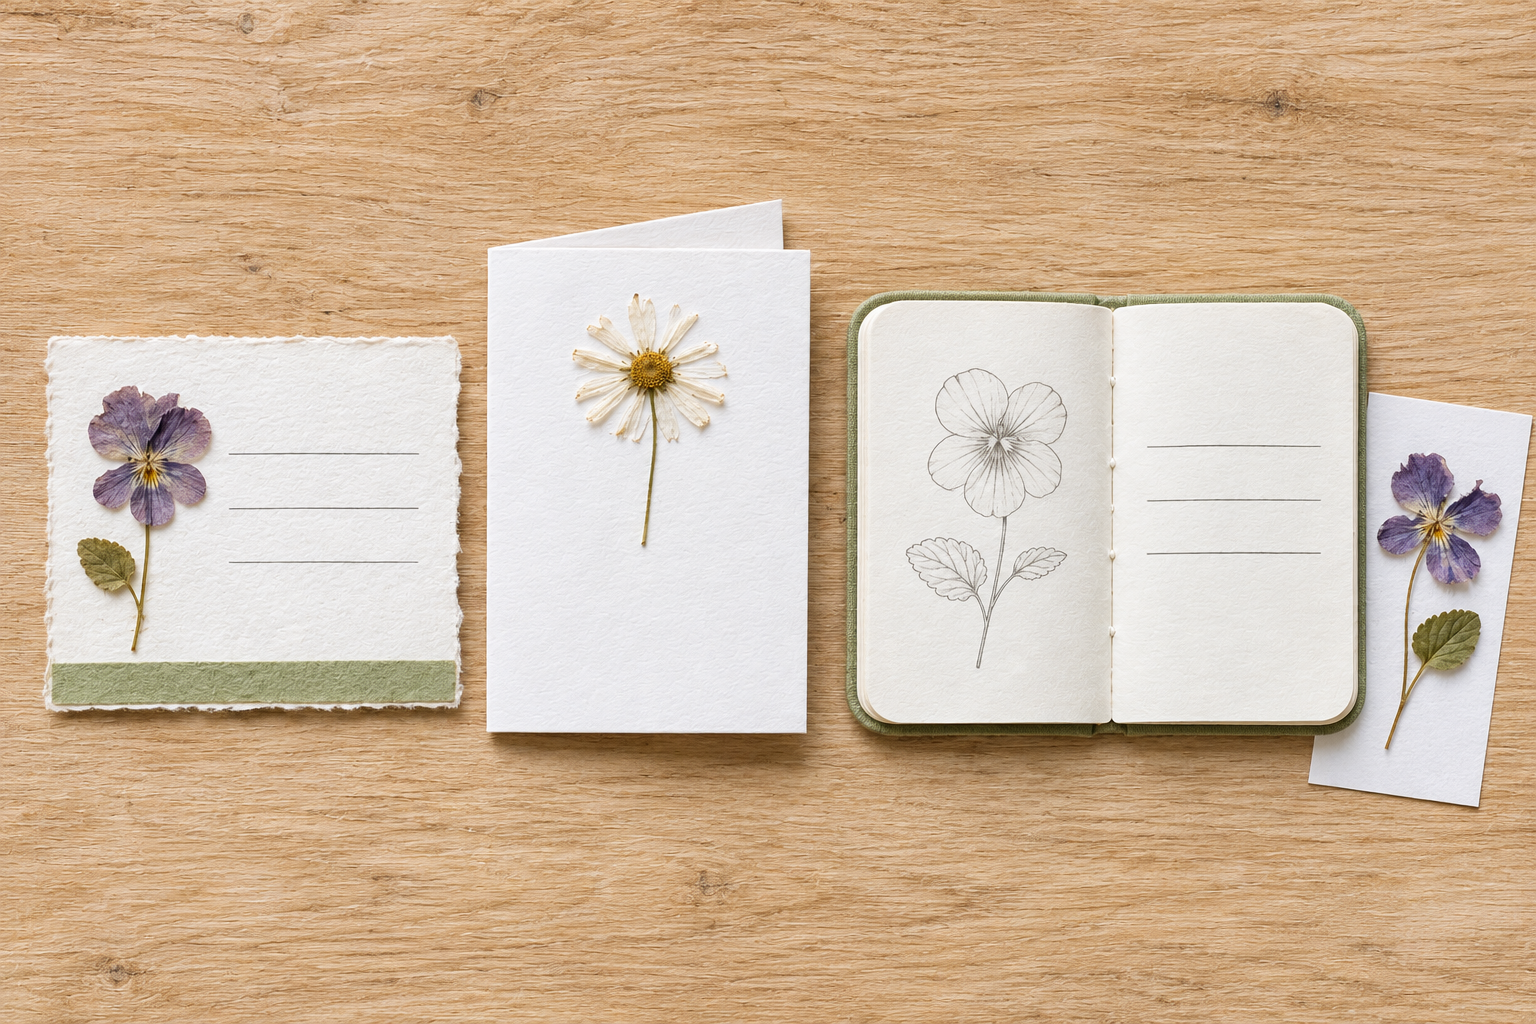
1. A one-flower observation card
Place a single bloom toward the left of a cream card. Leave the right side for three short notes: where it came from, the collection date and a detail you noticed. A narrow sage paper strip beneath the writing can connect the card to the rest of your journal without surrounding the flower with decoration.
For a starting page arrangement, browse our botanical junk journal ideas. Treat the flower as the focal point and adapt the paper layout around it.
2. A small botanical greeting card
Arrange one bloom above a short handwritten message. Keep a generous margin so the petals do not compete with the lettering. Try the placement without adhesive first. A spare piece of cream card makes a useful practice surface before you commit to your final layout.
Use a small amount of PVA to attach the dried specimen and let it dry fully; the Natural History Museum recommends glue rather than ordinary sticky tape for mounting.
3. A flower sketch beside a written memory
Place your pressed flower beside your workspace as a reference. Sketch its outline on a journal card, then write one sentence about the day you collected it. This option leaves the specimen separate while bringing its shape into the journal.
If drawing feels easier with a starting point, use our simple daisy drawing tutorial. You can also pair the sketch with a card from our botanical tags and journal cards pack.
Questions before you start
Do flowers need to be dry before pressing?
They should be fresh but free of surface water. Let dew or rain dry before pressing; you do not need to air-dry the whole bloom first. Removing moisture from inside the flower is part of the pressing process.
What is the best method for a beginner?
If you want to learn how to press flowers with supplies already at home, begin with a heavy book and absorbent paper. A cardboard press is a practical next step when you want to keep several small batches together. Choose the method you can leave in a dry, stable spot while it works.
Can I press flowers quickly in a microwave?
A purpose-made microwave flower press can shorten the process, but it needs a different setup. Follow the device’s instructions for materials, heating and cooling. Do not put the book-and-weight arrangement from this tutorial into the microwave. The slower book method is the focus of this beginner guide.
Can I press flowers without buying a flower press?
Yes. The book method uses absorbent paper and weight. A separate press is useful for organizing batches, but it is not needed to begin.
Can I press a whole rose?
A tightly layered rose is a harder first project because of its thickness. Try individual petals, or choose a naturally flatter bloom while learning the process.
Can I use pressed flowers for framing?
Yes. Start with fully dried specimens and plan the composition before attaching them to a backing. A single flower with a small label is enough for a simple botanical display.
What should I write beside my pressed flower?
Try its name, the date, a color description or a brief memory. For a personal journal, “the last flower from the kitchen vase” can be a more meaningful caption than a long paragraph.
Begin with one small batch and one page idea. Keep a note of the flower, paper and pressing date so your next attempt builds on what you learned.

Looking for another little project? Explore Journaling, Printables or Paper Crafts.