
Paper Christmas Ornaments: 3 Easy Shapes + Free Templates

Make paper Christmas ornaments with a few sheets of paper, a little string and three simple shapes. This free printable set includes a round bauble, a pointed drop and a small Christmas tree. Each ornament uses six matching pieces, folded down the middle and joined at the backs to create an open, three-dimensional shape.
Choose cream, sage and blush paper for a soft botanical look, or use small patterned scraps you already have. The PDFs contain plain cutting outlines and centre fold lines. The colored ornaments in the illustrations show styling possibilities; they are not preprinted decorations included in the download.
Download US Letter ornament templates
Download A4 ornament templates
Quick start: print page 2 for the round bauble, page 3 for the pointed drop or page 4 for the tree. Each page has all six pieces needed for one ornament. Select 100% / Actual Size, then check the 5 cm scale bar before cutting.
Table of Contents
Choose a shape for your paper Christmas ornaments
Start with the round bauble if this is your first folded-paper ornament. Its smooth edge makes it easy to line up the pieces. The pointed drop adds a longer silhouette, while the tree takes a little more care around its branch tips and short trunk. Use six copies of the same shape for each ornament.
| Shape | Flat outline (W x H) | Pieces per ornament | PDF page |
|---|---|---|---|
| Round bauble | 60 x 60 mm / about 2.36 x 2.36 in | 6 | 2 |
| Pointed drop | 45 x 65 mm / about 1.77 x 2.56 in | 6 | 3 |
| Paper tree | 50 x 65 mm / about 1.97 x 2.56 in | 6 | 4 |
The pointed drop has a point at both ends. The dimensions describe the flat cutting outline; the hanging loop adds extra height. Both PDF formats use the same pattern dimensions, so A4 and US Letter copies can be used together when they are printed at the correct scale.

Paper and supplies
- The A4 or US Letter template PDF and a printer.
- Plain copy paper for a first sample, plus your chosen decorative paper.
- Scissors and a ruler.
- A glue stick or paper craft glue that bonds your chosen paper.
- About 25 cm / 10 in of thin string for each hanging loop.
- Optional: a blunt scoring tool, paper clips, colored pencils or a small ribbon bow.
Ordinary copy paper is a useful place to start because it folds easily. For your decorative version, choose paper that holds a neat crease without cracking. Very thick card makes a bulky centre, while very thin wrapping paper may wrinkle under wet glue. Try one folded piece before cutting a whole set.
If the paper is patterned on one side, keep that decorative side inside the fold. The plain backs are the surfaces you join together. Once the ornament opens out, the patterned sides become the visible faces between the folds. With double-sided paper, decide which side you want to show before you begin.
You can also print one pattern on plain paper and trace it onto scrapbook-paper offcuts. This is helpful when you want to position a small flower, leaf or stripe on each piece. Keep the template flat as you trace, and mark the centre line lightly with pencil. Our simple paper-craft supplies guide has more ideas for using what you already own.
Print the free ornament templates
Download the file that matches the paper in your printer. Open it in a PDF viewer, choose portrait orientation and print one-sided. Select Actual Size or 100%. Turn off Fit, Shrink and similar options that resize the artwork.
Measure the line marked 5 cm on the pattern page. It should measure exactly 50 mm. If it does not, correct the printer settings before cutting. Printing only your chosen shape page saves paper; page 1 is the assembly reference.
Each shape page contains six complete outlines, so you do not need to print the same page six times. To make two round baubles, for example, print page 2 twice. If you are tracing onto decorative paper, one printed outline is enough as a reusable tracing guide.
How to make paper Christmas ornaments
Work through one ornament from start to finish before making a larger batch. Lay all six pieces in the same direction, particularly for the tree shape. The centre folds should meet along one straight spine.
1. Cut six matching pieces
Cut on the solid outside line. Keep the dashed centre line intact; it is a folding guide. Turn the paper as you cut curved edges, and use the tips of the scissors around the tree branches. Small differences show up when the pieces are stacked, so aim for consistent outlines.
2. Fold each piece down the centre
Fold each shape in half along the dashed line, with the decorative side facing inward. Match the two edges before pressing the crease. Smooth the fold with a fingernail or a blunt scoring tool. Do this for all six pieces, then stack them to check that the shapes line up.
Keep the inside of each fold free of glue. These two decorative faces need to open apart later. The glue goes on the outer, plain half-faces that touch the next folded piece.
3. Glue the outer halves together
Keep the first two pieces folded. Spread a thin, even layer of glue on one outer half of the first piece, then press it against an outer half of the second. Align the straight folded edges and the curved or pointed outside edges. Wipe away any glue that squeezes out.
Add the remaining folded pieces in the same way until all six form one stack. Every fold should face the same direction. Use a paper clip on a broad, flat area if the layers slide, and avoid squeezing the tree tips. Give the joins time to hold before opening the stack.
4. Add the hanging loop
Cut about 25 cm / 10 in of thin string, fold it in half and knot the two ends together. Place the knotted end inside the central spine, leaving the loop above the top of the ornament. Secure the knot and a short length of string with a small dab of paper craft glue. Keep the loop clear of the outer paper edges.
Thick twine can force a gap through the middle, so use a light string or thread for these small shapes. Make sure the knot sits inside the ornament rather than above the top point, where it could pull out.
5. Close the ornament
Gently fan the six folded pieces around the centre. Bring the first and last free outer half-faces together, with the string enclosed along the spine. Glue these final two faces together and align their edges. Space the six paper fins evenly instead of forcing all the folds in one direction.
6. Let it dry and check the loop
Let the glue dry fully according to its packaging. If a seam starts to lift, press it closed again before hanging. Give the loop a gentle tug over your work surface, then hang the ornament indoors, away from candles and heat. Add a small bow only after the paper joins are secure.
Simple ways to style your paper ornaments
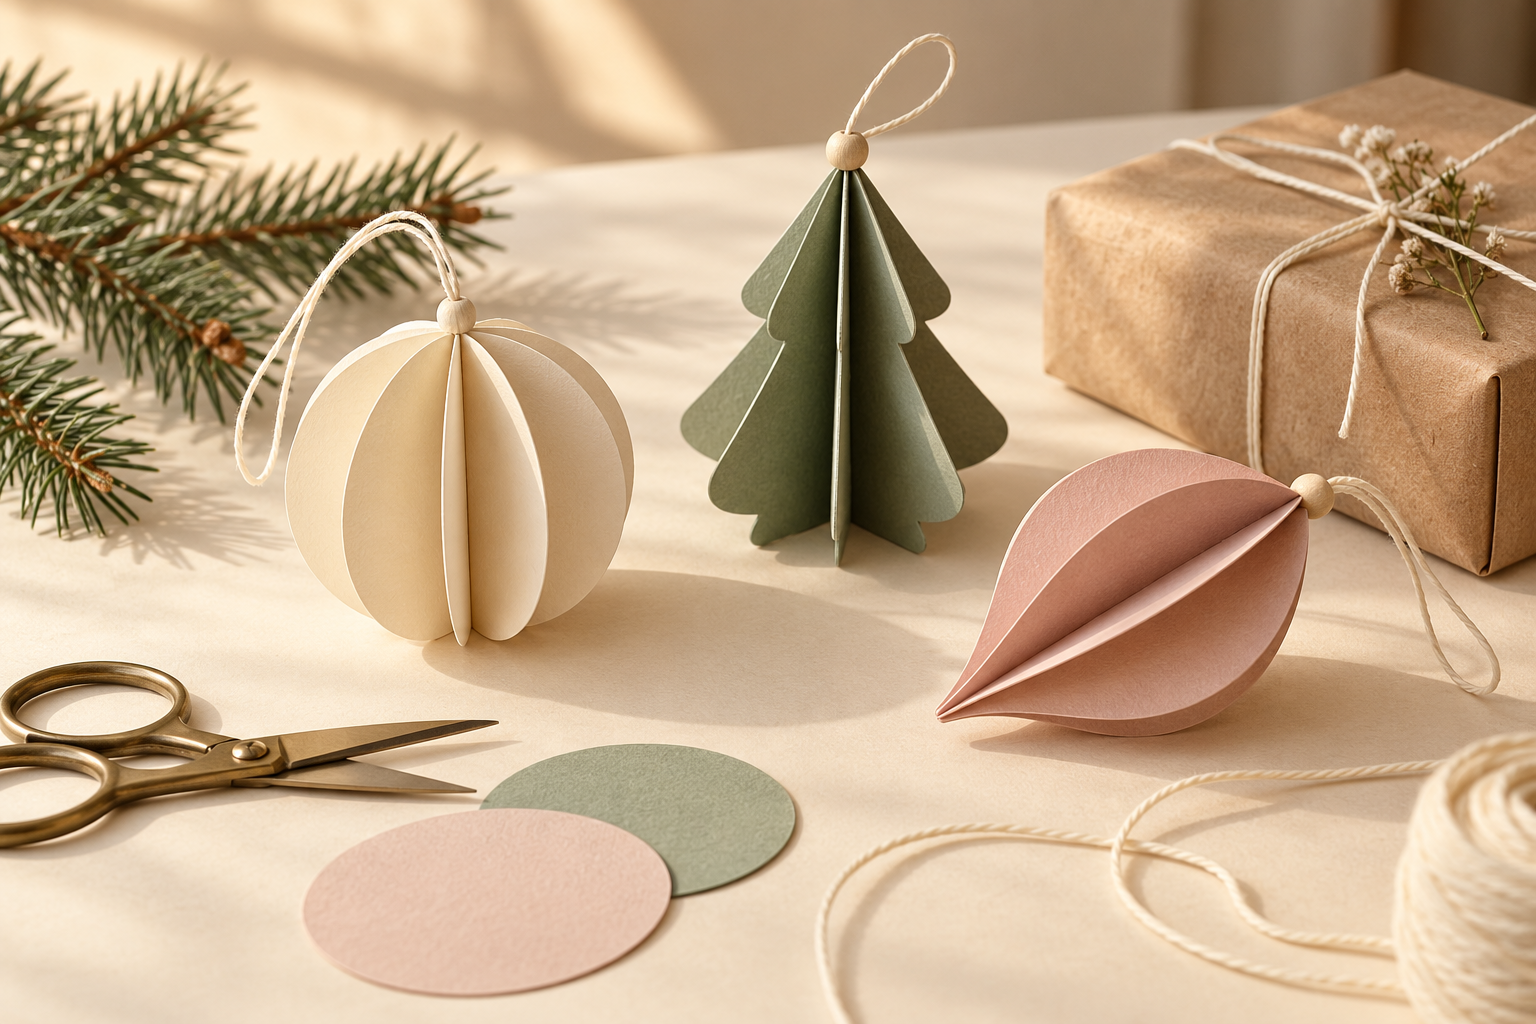
- A quiet botanical trio: make a cream round bauble, a blush pointed drop and a sage tree. Use matching cream loops to connect the different shapes.
- Pattern and plain paper: alternate three patterned pieces with three plain pieces of the same shape. Keep the decorated sides inside the folds as you assemble.
- A reusable gift topper: tie a finished ornament onto the ribbon around a gift so the recipient can hang it afterward.
- A paper-scrap collection: use offcuts from the same color family. Keep all six pieces similar in thickness so the folds open evenly.
For a matching gift, add one of our free botanical Christmas gift tags or tuck a short message into a mini printable envelope. If you prefer to decorate your own paper, try a few small leaves or stars from the easy Christmas doodles guide before cutting.
Fix common paper ornament problems
| What you see | What to try |
|---|---|
| Uneven outside edges | Check the cutouts before gluing. Align the centre folds first, then adjust the outer edges while the glue is still workable. |
| The ornament will not open | Check whether glue has sealed an inner fold. Leave the decorative inner faces unglued and join only the outer half-faces. |
| Wrinkled paper | Use less wet glue, or test a glue stick on a spare piece. Thin paper needs a light adhesive layer. |
| A bulky centre gap | Try thinner string and paper. Keep the folds aligned and use only a small dab of glue around the hanging knot. |
| Seams lift after assembly | Press them together while the adhesive sets. Test your glue on the paper first, especially if the surface is coated. |
| Tree points bend | Handle the piece at its centre and broad lower branches. Avoid clipping or pressing directly on narrow tips. |
Download the paper Christmas ornaments PDF set
Both files contain the same four pages: an assembly guide, six round baubles, six pointed drops and six tree outlines. The templates are black-and-white outlines on white paper, with dashed centre lines and a 5 cm print check. One complete printed set supplies the pieces for three ornaments: one of each shape.
Download US Letter ornament templates
Download A4 ornament templates
The files are for personal use. You may print copies for your own crafting and gifts. Please share the link to this article rather than uploading the PDFs elsewhere. The download contains PDF patterns only; it does not include a cutting-machine file or the colored styling illustrations.
Frequently asked questions
Can I make these ornaments without a cutting machine?
Yes. The patterns are designed for scissors. Print the outlines directly onto suitable paper, or cut out one plain template and trace it onto your decorative paper. A ruler helps you mark and crease the centre line.
How many pieces do I need for one ornament?
This set uses six identical full shapes per ornament. Fold all six in half, join the outer halves in a stack, then close the first and last free halves together. Do not mix the round, pointed and tree shapes in one ornament.
Why do flat pieces become a three-dimensional ornament?
The centre folds form a shared spine while the paper faces spread around it. The same idea is explored in the 2D to 3D Baubles activity from Maths Week Scotland, which is a useful extra resource for a group craft session.
Can I make paper Christmas ornaments from book pages?
Yes, if the pages are sturdy enough to hold a crease and you are comfortable cutting them. Use spare printed pages or a damaged, unwanted book rather than anything you want to preserve. Trace the six outlines onto the back, keeping the centre line in the same position on every piece. Avoid brittle paper that cracks when folded. For thin pages, try the round bauble first; its smooth edge is less fiddly than the tree tips. Let ink or printed decoration dry before gluing, and test your adhesive on an offcut for wrinkling or ink transfer.
Can I store them flat?
This version has a permanently glued closing seam. Store the finished ornaments loosely in a small box rather than pressing them flat. Keep them dry and avoid stacking heavy decorations on top of the paper fins.
Can I change the size?
You can scale all six pieces of a shape by the same percentage, but the dimensions listed here apply only at 100%. Enlarged patterns may not fit on one page. Make a small paper sample first, and do not mix pieces printed at different scales.
Save this guide for your next paper-craft afternoon, or print one shape page and start with a single ornament. A small matching set is easy to build up as you find paper scraps you like.

Looking for another little project? Explore Journaling, Printables or Paper Crafts.