
Paper Flowers: 3 Easy Designs for Beginners
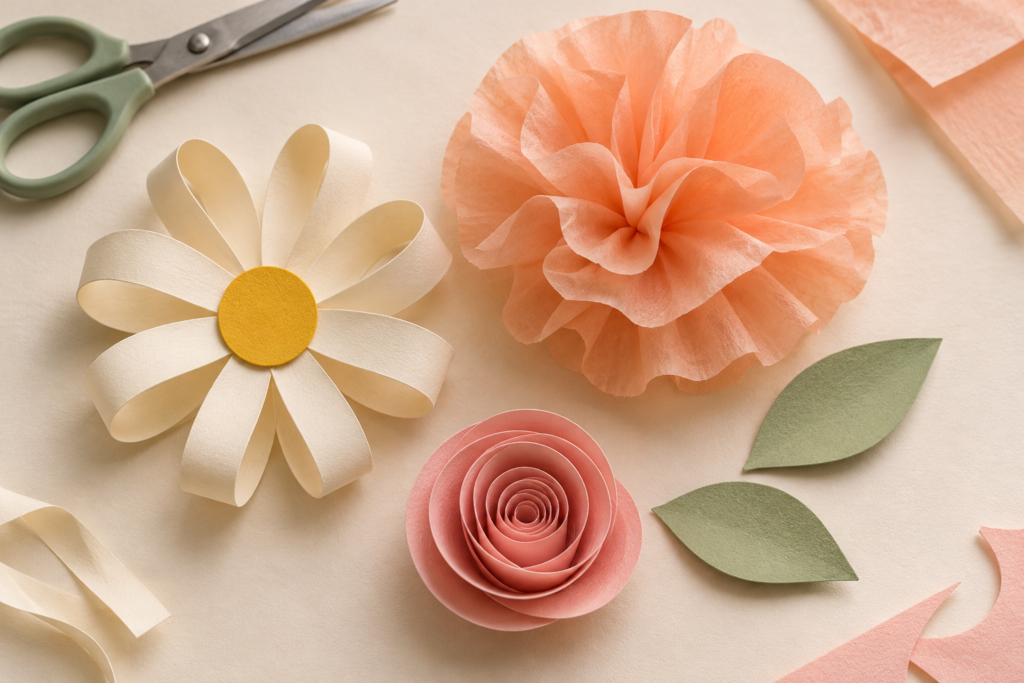
Paper flowers turn a few sheets of paper into a thoughtful gift topper, a cheerful card or a little decoration for your craft shelf. You do not need a cutting machine to get started. Choose one of the three designs below, gather a few simple supplies and make a single bloom before planning a whole bouquet.
These three craft ideas cover a rolled rose, a fluffy tissue flower and a loop-petal daisy. Each uses a different way of shaping paper, so you can find the method you enjoy without buying a large craft kit.
How to make paper flowers: cut and roll a paper spiral for a rose, fold and separate tissue layers for a fluffy bloom, or glue paper-strip loops around a circle for a daisy. Start with small pieces and let glued joints dry before adding decorations.
Download the free paper flower templates
The paper flowers printable includes a quick guide, a rolled rose spiral, loop-petal daisy pieces, and a tissue flower size guide. Choose A4 or US Letter; both contain the same templates.
Free for personal use. Print at 100% / Actual Size, turn off Fit or Shrink, and check the 5 cm reference line before cutting. The templates are optional: you can also measure and cut the shapes by hand.
Choose paper flowers for your first project
Think about where the finished flower will go. A small rolled rose suits a gift box. A tissue flower adds volume to a garland. A loop-petal daisy gives a card a playful, dimensional finish.
| Design | Paper to start with | Main technique | Good first use |
|---|---|---|---|
| Rolled rose | Colored paper or light cardstock | Cut a spiral and coil it | Gift topper |
| Tissue flower | Gift-wrap tissue paper | Accordion folds and gentle fluffing | Garland or table decoration |
| Loop-petal daisy | Colored paper and a cardstock base | Join paper strips into loops | Hand-delivered greeting card |
For a calm botanical palette, combine blush, peach, ivory and sage. For a bolder project, choose one bright petal color and repeat it across several flowers. Keeping the same leaf color helps different designs look like a set.
Supplies for making paper flowers
- Colored paper or lightweight cardstock for roses, leaves and daisy petals
- Tissue paper for the fluffy flower
- Scissors, a pencil and a ruler
- Paper craft glue; a glue stick is useful for flat paper joins
- A short length of cotton string for the tissue flower
- A scrap of cardstock for flower bases
- Optional: a pencil or smooth round pen for loosening paper curls
Choose paper that bends without fighting you. If a sheet feels stiff when wrapped around a pencil, try something lighter for the rose. Save heavier cardstock for backing circles and gift tags. Ordinary printer paper is useful for a practice flower before cutting your favorite colored sheets.
Tissue paper behaves differently: it is thin enough to separate into soft layers, but tears easily. Crepe paper has ridges and stretch and is useful for shaped botanical petals; it is not needed for these three projects. If you want to explore that material later, Lia Griffith’s beginner paper-flower collection offers a useful next step.
Keep your workspace dry and use a small amount of glue. A puddle makes thin paper wrinkle and leaves you holding the flower together for longer. With children, use age-appropriate scissors and supervise cutting. These projects do not require hot glue.
1. Make a rolled paper rose
Rolled paper flowers are a forgiving first project because a slightly uneven spiral still creates an attractive layered bloom. Start with one practice rose, then adjust the circle size and looseness of the coil.
- Cut a circle. Draw a circle about 6 inches (15 cm) across on colored paper and cut it out. It does not need to be perfectly round.
- Cut a spiral. Work from the outside toward the center, keeping the strip roughly 1/2 inch (1.3 cm) wide. Leave a small round pad at the center attached to the strip; this becomes the base.
- Roll from the outer tip. Curl the outside end into a small coil. Continue winding toward the center, keeping the lower edge reasonably even.
- Let the coil relax. Hold it over the center pad and loosen your grip a little. Stop when you like the spacing between the layers.
- Glue the base. Spread a thin layer of craft glue on the center pad, press the coil onto it and hold until it grips. Follow the glue’s drying instructions before lifting the flower.
Keep the first rose simple. A tight coil reads as a bud; a looser coil creates a wider flower. If it springs open, set the coil down, gather it gently and try again before adding more glue. Avoid pulling on the outermost edge while the base is still wet.
Add two small leaves cut from green paper beneath the base. Fold each leaf lightly along its length, then open it again to give it a little shape. Attach the leaves underneath so the flower’s upper surface stays tidy.
2. Make easy tissue paper flowers
This accordion method gives you a soft, fluffy bloom without cutting individual petals. Use gift-wrap tissue rather than facial tissues for a more predictable stack of separate sheets. Gathered’s tissue-flower tutorial also shows the basic fold-and-fluff technique.
- Stack the tissue. Cut six rectangles about 6 × 8 inches (15 × 20 cm). Align their edges.
- Fold an accordion. Starting at a 6-inch edge, fold the entire stack forward and back in strips about 1/2 inch (1.3 cm) deep. Continue along the 8-inch length.
- Tie the middle. Wrap cotton string around the center of the folded strip and knot it snugly. Leave longer ends if you plan to tie the bloom to a garland.
- Shape the ends. Round both ends with scissors. Cut through a few layers at a time if the stack is difficult to trim.
- Open the fans. Spread the folds on both sides of the tie. Keep one hand near the center so the stack stays together.
- Lift one layer at a time. Gently separate the top sheet toward the center, working across both halves. Repeat with the remaining sheets and adjust the edges.
Fluff all layers toward the same side for a flower with a flatter back. This shape is easier to attach to a parcel or display board than a fully round pom-pom. Stop tugging if a layer catches; open the fold with your fingertips before lifting again.
For a two-tone flower, put one lighter sheet on top of five darker sheets. Separate that top sheet first so the lighter color appears near the center. Try a small sample before making a whole set because tissue thickness changes how full the finished bloom looks.
3. Make a loop-petal paper daisy
These paper flowers use narrow strips joined into loops. The petals stay rounded instead of being folded flat, creating a simple sculptural daisy. The dimensions below let you cut the pieces by hand, or you can use the optional printable templates above.
- Prepare the pieces. Cut eight ivory or white strips, each about 1/2 × 4 inches (1.3 × 10 cm). Cut a backing circle about 1 1/2 inches (4 cm) wide and a smaller yellow circle for the center.
- Make eight loops. Bring the short ends of each strip together, overlap them slightly and glue. Keep the curved end rounded; do not crease it. Let the joins set.
- Place the first four petals. Glue the joined ends to the backing circle at the top, bottom, left and right. The loops should extend outward.
- Fill the gaps. Add the remaining four loops between the first petals. Check the spacing before the glue dries.
- Cover the joins. Glue the yellow circle over the middle. Keep glue away from the outer loops so they retain their shape.
Make a smaller daisy by shortening the strips and reducing the center circle. Test one loop against the backing before cutting the full set. For a card, place the flower slightly above center and leave writing space below or inside.
If you prefer a completely flat floral detail for a journal page, try our easy daisy drawing tutorial. Dimensional loops are better suited to covers, boxes and cards that will not be pressed between pages.
Use your paper flowers for gifts and paper crafts
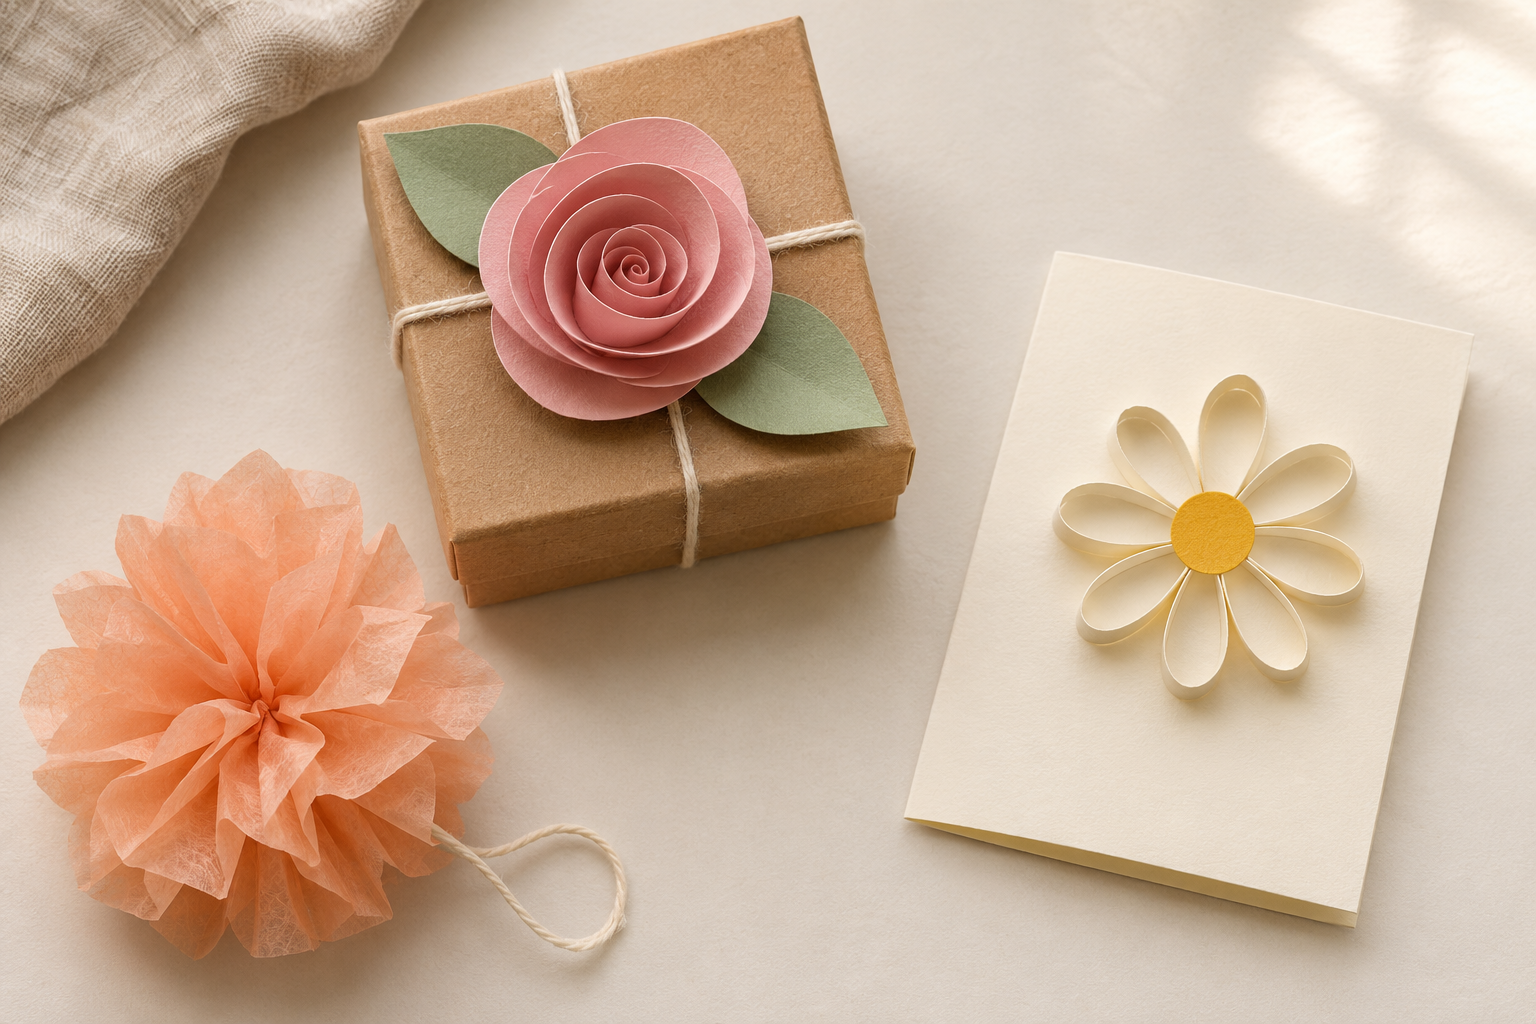
Give each finished bloom a job before making dozens. This helps you choose the right size and avoids delicate petals being crushed inside envelopes or journals.
- Dress a gift box. Glue a rose to a small backing circle, then attach that circle to a paper belly band around the box. The decoration can slide off with the band.
- Make a hand-delivered card. Place a loop daisy on a sturdy card blank. Transport it in a shallow box if the loops project too far for an envelope.
- Build a light garland. Use the long ties on tissue flowers to fasten them to string. Arrange the spacing on a table before hanging.
- Decorate a journal cover. Use a small rose on a removable wrap rather than between pages. For coordinating flat layers, explore our botanical junk journal ideas.
- Finish a gift tag. Pair a tiny flower with one of our free botanical tags, leaving the name area clear.
For a cohesive set, repeat one petal color on the card and parcel, then use sage leaves as the connecting detail. A plain background gives the folds and curves room to show.
Size paper flowers for your project
Before cutting a batch of paper flowers, lay a paper circle on the card or box to test the footprint. Leave a clear border around it and space for the recipient’s name. The finished bloom also has height: a flat circle helps you judge width, but cannot tell you whether raised petals will fit inside the packaging.
Make one complete sample and try closing the box without pressure. For a matching set, keep that sample beside you while you cut the remaining pieces. Write the starting dimensions on a spare piece of paper so you can repeat the size later. Attach decorations after wrapping the gift, and keep loose flowers in a separate shallow tray while the glue sets.
Fix common paper-flower problems
| Problem | What to try |
|---|---|
| The rose unrolls | Use a larger center pad and hold the lower edge against it until the glue grips. Let it dry before adding leaves. |
| Tissue tears near the tie | Separate one sheet at a time and loosen caught folds before lifting. Tuck a small tear beneath a neighboring layer. |
| The daisy looks uneven | Lay out all eight petals before gluing. Use the first four as a compass and fill the gaps. |
| Paper curls around a glue spot | Use less glue and test it on an offcut. Keep delicate petals away from wet joins. |
| The finished flower is too bulky | Reduce the starting pieces or choose a flatter decoration for that project. Do not force a raised flower into a tight envelope. |
Store finished flowers in a shallow box with enough space above them. Keep them dry and out of prolonged direct sunlight. Carry the box by its base rather than placing objects on top of the blooms.
Paper flowers: common questions
Can I make paper flowers with normal paper?
Yes. Ordinary colored or printer paper works for practice roses and loop petals. Use tissue paper for the fluffy accordion design. A sheet that is suitable for one method may be too stiff or too fragile for another.
Do I need a template or a cutting machine?
No. These three designs use a circle, rectangles and strips that you can draw with a pencil and ruler. If you prefer a printed guide, download the free A4 or US Letter templates. Cut one practice set by hand, then use those pieces as size guides if you want several matching blooms.
Can I make these flowers without hot glue?
Yes. Paper craft glue works for the rose and daisy when you allow the joins to set. The tissue flower is held together with string. Choose an adhesive labeled for paper and follow its instructions.
How can I add a stem?
For the tissue design, a pipe cleaner can replace the center string; twist it around the folded stack before fluffing. For a rose or daisy, sandwich the end of a paper straw between the backing and an extra cardstock circle, glue securely and let it dry. Check that the stem supports the flower before arranging it upright.
What should I make first?
Choose the loop daisy if you like measuring and arranging pieces, the tissue flower if you enjoy soft layers, or the rose if you want to practice rolling. Make one bloom, note what you would change, and use that small result to plan your next set of paper flowers.


Looking for another little project? Explore Journaling, Printables or Paper Crafts.