
How to Start a Junk Journal: 7 Easy Steps
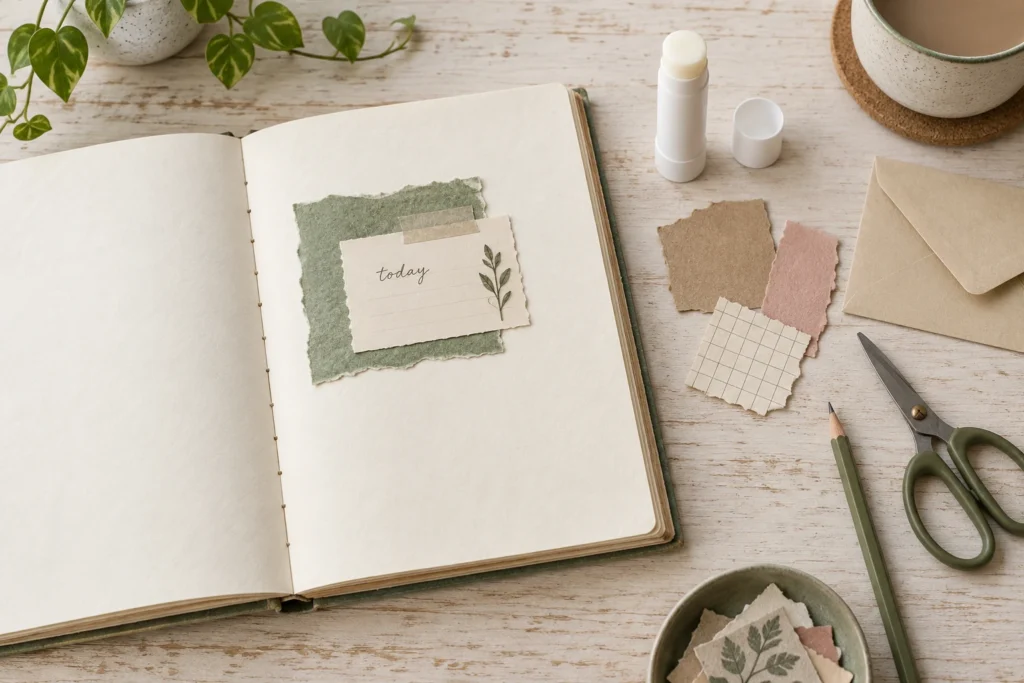
Wondering how to start a junk journal? Open a notebook, choose two clean paper scraps, add a small writing card and record one detail from your day. Arrange everything before gluing. That is enough for a first page: you can learn about pockets, binding and decorative extras later.
This guide walks through seven practical steps, from choosing a notebook to keeping your next session simple. You can follow along without a printer, a purchased kit or bookbinding tools. The aim is a page you want to keep, made with supplies you feel comfortable using.
Table of Contents
What is a junk journal?
A junk journal combines collected paper, decoration and writing. Its pages might hold clean packaging, envelope pieces, a ticket copy, drawings, notes or photographs you have permission to use. Some makers build the whole book from mixed papers; others decorate pages in a ready-made notebook. For this beginner project, use an existing notebook so you can focus on the page itself.
There is no required vintage look or color palette. A quiet page with a few words belongs just as much as a colorful collage. A junk journal can record memories, hold creative experiments or collect things you notice. Decide what interests you today instead of trying to make every page match.
How to start a junk journal: your five basic supplies
Begin with a notebook, a few clean paper scraps, paper adhesive, scissors and a pen. A glue stick is a simple option for lightweight paper. Check the adhesive label for suitable materials and drying instructions, and test unfamiliar paper or ink on a spare scrap before using it in your journal.
For your first session, put just a few pieces on the table. A large pile makes choosing harder. Optional supplies such as paper tape, stickers, stamps, specialty punches and decorative inks can wait until you know what you enjoy making. You do not need to buy something for every idea you save online.

1. Choose a notebook you already own
Look for a notebook that opens comfortably and has enough room for your handwriting. Blank, lined and dotted pages all work. A smaller notebook uses fewer scraps, while a larger page gives you more room to arrange a collage. Choose the size you would actually enjoy taking out of a drawer.
Open it near the middle and try writing a sentence. If the book springs shut or the binding gets in your way, another notebook may be easier. Thin pages can still work if you keep layers light. Wet paint and lots of liquid glue are separate experiments; this first project uses dry paper pieces and a modest amount of adhesive.
You do not need to remove pages or alter the cover to begin. Avoid cutting into the binding of an unfamiliar notebook. As the journal fills, watch how easily it closes and reduce bulky additions if necessary. Building a handmade book is a project you can explore after making a few pages.
2. Collect a small handful of usable paper
When learning how to start a junk journal, collect selectively. Try a clean envelope, a paper bag, a piece of wrapping paper, an old calendar you no longer need or a small printout. Choose flat pieces that are dry and free from food residue. Set aside anything damp, dirty or likely to shed onto the page.
Use copies of irreplaceable photos and keepsakes. Ordinary craft materials are not automatically suitable for preserving originals. The Library of Congress photograph-care guide explains why handling and storage materials matter. A journal made for everyday creativity serves a different purpose from an archival album.
Before sharing photos of your pages, check tickets, envelopes and receipts for names, addresses, booking details or payment information. Trim those areas away or use a copy with the private details removed. For a first page, two background scraps and one plain writing card are plenty.
3. Pick one small subject
Give the page a simple job. You might record something you noticed on a walk, a meal you enjoyed, a book you started or a kind message. A subject helps you decide which papers belong together without needing a carefully planned theme for the whole journal.
Write one sentence on spare paper before arranging your pieces. “Today I noticed…” or “I want to remember…” is a useful beginning. If you do not want to write about your day, choose a color and list three things it reminds you of. The subject can be ordinary; it only needs to matter to you.
For more starting points, explore our nine easy junk journal page ideas. That guide offers different arrangements, while this one explains how to start a junk journal and complete your first session.
4. Arrange your pieces without glue
Place one paper scrap on the page, then overlap part of it with a second. Add a smaller plain card where your words will go. Keep the card large enough for comfortable handwriting. Leave some uncovered page around the pieces rather than trying to fill every corner.
Move the card above, below or beside the scraps and compare the result. One patterned paper with one plain paper is often easier to arrange than several strong patterns. If you feel stuck, remove a piece instead of adding another. A loose arrangement is easy to change; a glued one is harder.
Check the edges and the binding. Nothing should stop the page from turning or make the notebook difficult to close. You can take a quick photo of your arrangement as a reminder before lifting pieces to attach them. The diagram below uses rectangles to show placement; it is not a full-size cutting template.

5. Write your note, then attach the layers
Write the date and your chosen sentence on the plain card while it is still flat on the table. Add a second sentence if you want to explain why the moment mattered. Let the ink dry before handling it, especially if you use a pen that can smudge.
Attach the lower paper first, followed by the overlapping scrap and then the writing card. Use a thin, even amount of an adhesive intended for your paper. Press each layer gently from the center toward the edges. Keep glue away from the page hinge and wipe stray adhesive before it transfers to another page.
Follow the product’s drying instructions before closing the notebook. If an edge lifts later, add a small amount of suitable adhesive underneath rather than coating the whole front. The page does not have to be perfectly square or symmetrical to be finished.
6. Add one optional detail
Choose one small finishing touch: a leaf doodle, a narrow paper strip, a date label or a tiny tag. Repeat a color already on the page so the detail feels connected. This is optional; if your words and papers already feel balanced, stop there.
For a printable accent, our botanical tags and journal cards are a useful starting point. If you prefer an interactive detail, try a simple journal tag pocket on a later page. Let each new technique have its own small project.
Keep additions thin while you learn how your notebook handles layers. Thick ornaments, chunky clips and several stacked cards can make a journal difficult to close. A flat paper detail usually gives you enough variety for a first experiment.
7. Make it easy to return
Knowing how to start a junk journal is useful; making the next session easy is what helps you continue. Put your pen, adhesive and a few favorite scraps in one small pouch or box. Keep only pieces you can imagine using, rather than saving every bit of packaging.
Choose a small next step before packing away. It might be collecting one color, finishing a sentence or trying a pocket. You do not need to fill a page every day. Some sessions can be only writing; others can be arranging loose pieces for later.
Look back at the first page and note one thing you liked making. Use that as the starting point for the next page. Over time, your preferences will give the journal its character more naturally than buying a large matching collection at the beginning.
A first-page example: a quiet morning. To put these instructions on how to start a junk journal into practice, choose a plain notebook page, a clean brown paper bag and a small scrap of pale patterned paper. Tear a rectangle from the bag that covers roughly a third of the page. Place the patterned piece partly over one corner, leaving room for a plain writing card. These proportions are suggestions, so adjust them to fit your notebook.
On the card, write the date and finish the sentence “This morning, I noticed…” with one specific detail: the light through a window, a song, or something you read. Keep the card loose until you have checked that all the words are visible. If the pattern competes with the handwriting, slide more of it behind the brown paper.
Once you like the arrangement, attach the layers in order and let them dry as directed by the adhesive maker. Add a tiny hand-drawn leaf beside the date if you want a finishing detail. The same arrangement can become a reading page by changing the sentence to “A line I want to remember…” or a weekend page with “One small highlight was…”. You have one reusable starting layout, with no need to redesign every page.
Quick fixes for common first-page problems
The page looks crowded. Remove a decoration, use fewer patterned papers or leave a plain margin around the writing card. If everything is already attached, keep the next page quieter instead of trying to repair every detail.
The paper wrinkles. Use less wet adhesive on the next piece and test your paper-and-glue combination on a scrap. Let the page dry fully before closing it. Thin recycled papers react differently, so a method that works on cardstock may not suit tissue-like paper.
My pen shows through. Write on a separate card, then attach it to the page. Test the pen first and avoid pressing too hard. You can keep the reverse side simple if the marks still show.
I cannot choose a theme. Make a page about one thing in front of you. Two papers in similar colors and one sentence are a complete starting point. A theme for the entire journal can wait.
Questions about how to start a junk journal
Can I learn how to start a junk journal without buying supplies? You can start with what you already own if you have a notebook, paper, a pen, scissors and suitable adhesive. If something is missing, keep your first project simple and buy only the essential item you need. There is no requirement to buy a themed kit.
Do I need a printer? No. Cut or tear clean paper scraps and make writing cards from plain paper. Printables are an optional shortcut, not a prerequisite. Our free layout reference sheet can also be viewed on screen while you make a page.
Does a junk journal have to be handmade? You can build a book yourself, but an existing notebook is a practical place to begin decorating and writing. If book construction interests you later, the Library of Congress book-arts teaching resource includes a junk-book journal activity.
What should I do after my first page? Repeat the same arrangement with a different memory, or choose one new technique. The next goal can be a second finished page rather than a more complicated one. Save this guide on how to start a junk journal for the next time you need a simple starting point.


Looking for another little project? Explore Journaling, Printables or Paper Crafts.